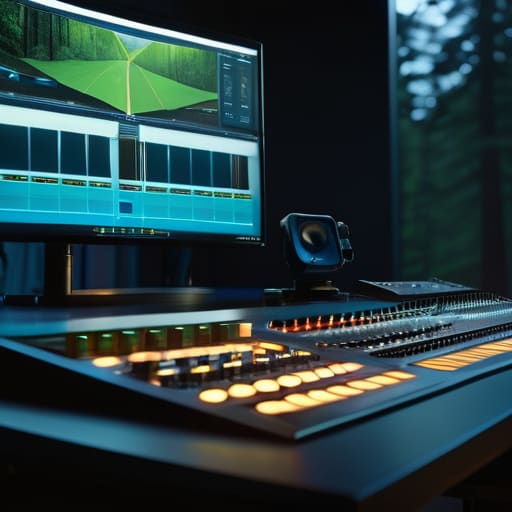
I still remember sitting in a windowless basement studio at 3:00 AM, staring at a monitor that looked neon-green because the cheap LED strip behind it was bleeding light everywhere. I thought I was a master of color science, but I was actually just lying to myself. I spent thousands on high-end monitors only to realize that my workspace was sabotaging every decision I made. Most people think you can just buy a fancy display and call it a day, but they completely ignore the reality of Environment Priming Color Grading Suites and how much your physical surroundings actually dictate your final grade.
Look, I’m not here to sell you a $50,000 architectural overhaul or some overpriced “pro” lighting kit that does nothing but look pretty on Instagram. I want to show you how to actually control your visual field so your eyes don’t betray you halfway through a session. We’re going to strip away the marketing fluff and focus on the practical, battle-tested setups that actually work. I’m going to give you the real blueprint for building an environment that supports your vision instead of fighting it.
Table of Contents
Calibrated Workspace Setup and Essential Colorimetry Standards
You can’t just throw a high-end monitor on a desk and call it a day; your entire physical space has to respect the math behind the pixels. A proper calibrated workspace setup starts with neutralizing everything that isn’t your screen. This means obsessing over ambient light control for colorists to ensure that no stray sunlight or flickering overhead LEDs are tricking your eyes. If your room is bouncing light off the walls, you aren’t seeing the grade—you’re seeing a lie.
Beyond just the lighting, you need to get clinical about your technical benchmarks. Following strict colorimetry standards for grading rooms ensures that the skin tones you see in your suite are the same ones the audience sees on a calibrated consumer display. This involves more than just a brightness slider; it requires managing chromatic adaptation in post-production so your brain doesn’t subconsciously shift its perception of white balance. If you aren’t controlling the environment, you’re essentially fighting your own biology every time you hit play.
Achieving Perfect Ambient Light Control for Colorists
Let’s be honest: you can own a $30,000 reference monitor, but if your room is leaking sunlight or bouncing glare off a white wall, your grade is essentially a lie. Achieving true ambient light control for colorists isn’t just about dimming the lights; it’s about total environmental management. You need to eliminate any uncontrolled light sources that could trigger chromatic adaptation in post-production, causing your eyes to subconsciously compensate for the room’s color temperature rather than the image on the screen.
Beyond the hardware and the lighting, don’t overlook the mental fatigue that comes with staring at high-intensity displays for twelve hours straight. Maintaining your focus is just as vital as maintaining your color accuracy, and sometimes you just need a way to unplug and decompress once the grading session is finally wrapped. If you’re looking for a way to shift your headspace and connect with people outside of the technical grind, checking out something like northwest adult chat can be a great way to find that much-needed social distraction after a long day in the dark.
To get this right, focus heavily on specular reflection reduction. This means more than just heavy curtains; it means managing how light hits your desk, your gear, and even your skin. If you have a glossy monitor stand or a bright white desk surface, you’re inviting distracting highlights that mess with your perception of shadow detail. Aim for a matte, neutral-gray finish on all surrounding surfaces to ensure that what you see is purely the signal, not the room’s reflection.
Beyond the Monitor: 5 Pro Moves for a Primed Grading Environment
- Neutralize your surfaces. If you’re grading in a room with white walls or a glossy desk, you’re essentially fighting a constant battle against color bounce. Swap those out for matte, neutral grey finishes to stop your environment from lying to your eyes.
- Ditch the overheads for bias lighting. Standard ceiling lights are the enemy of precision. Instead, use high-CRI LED strips behind your monitors to create a subtle glow that reduces eye strain without washing out your perceived contrast.
- Mind your thermal stability. It sounds overkill, but temperature swings can actually affect how you perceive color shifts over a long session. Keep your HVAC consistent so your brain isn’t subconsciously adjusting to the room’s heat.
- Invest in acoustic dampening. It’s not just about the audio in your film; a room with too much echo creates a chaotic mental headspace. A quiet, “dead” room helps you settle into the flow state required for deep color work.
- Implement a strict “No Phone” zone. Digital blue light is a massive disruptor. If you’re constantly glancing at a smartphone screen mid-grade, you’re resetting your visual adaptation and throwing your color judgment completely off whack.
The Bottom Line
Don’t treat your room like an afterthought; your lighting and colorimetry are just as critical to the final grade as your software settings.
Achieving visual accuracy requires a strict marriage between calibrated hardware and a controlled, neutral ambient environment.
If your workspace is fighting your eyes, you’re making creative decisions based on lies—fix your environment to trust your monitor.
## The Psychology of the Suite
“A color grading suite isn’t just a room with expensive monitors; it’s a sensory deprivation tank for your eyes. If your environment is leaking light or visual noise, you aren’t grading the image—you’re grading your own distractions.”
Writer
The Final Grade
At the end of the day, building a high-end color grading suite isn’t just about buying the most expensive monitor or the flashiest control surface. It’s about the synergy between your hardware and your physical space. We’ve covered how critical calibrated colorimetry is for accuracy, and how mastering your ambient light is the only way to prevent your eyes from lying to you. When you get these fundamentals right—from the way your walls absorb light to the way your workspace is primed—you stop fighting your environment and start trusting your eyes again. It’s about removing the variables so that the only thing left to focus on is the creative intent behind every pixel.
Building this kind of sanctuary takes time, discipline, and a fair amount of trial and error, but the payoff is immeasurable. There is a profound shift that happens when you sit down in a perfectly primed suite; the world outside disappears, and you are left alone with the image. Don’t settle for “good enough” when it comes to your viewing environment. Invest in the space, respect the science of light, and you will find that your ability to tell stories through color will reach levels you previously thought were impossible. Now, go out there and master the atmosphere.
Frequently Asked Questions
How do I balance the need for total darkness with the eye strain that comes from staring at a high-nit monitor?
The “cave” approach is a trap. If you’re sitting in pitch blackness staring at a 1000-nit HDR master, you’re basically inviting a migraine. You need a middle ground. Aim for a dim, neutral-gray environment rather than total darkness. Use subtle, indirect bias lighting behind your monitor to bridge the gap between the screen and the wall. It reduces the harsh contrast ratio, saving your eyes without washing out your perception of black levels.
Is it actually worth investing in expensive acoustic treatment, or does sound bleed really affect my color perception?
It sounds like a stretch, right? Why care about sound when you’re looking at pixels? But here’s the reality: your brain is a processing machine, and it hates sensory conflict. If your room is an acoustic mess, your subconscious is constantly working to filter out that auditory clutter. That mental fatigue bleeds directly into your visual judgment. You aren’t just “hearing” the noise; you’re feeling the distraction, and it absolutely kills your color accuracy.
What are the most cost-effective ways to DIY an ambient light control setup if I don't have a dedicated studio room?
If you’re working from a bedroom or a corner of the living room, don’t panic. You don’t need a blackout studio to get decent results. Start by ditching any windows or using heavy, matte black blackout curtains to kill that unpredictable natural light. Next, grab some inexpensive black foam core boards to create makeshift light baffles around your desk. It’s all about containment—if you can stop the light from bouncing off your walls, you’ve won half the battle.
